Remove Blur from Image vs Sharpen Image: Which Fixes Soft Photos Better? (2026)
Deblur vs Sharpen — a practical guide to remove blur from image: when to use deblurring for motion/defocus and when to use sharpening as a finishing touch.
Soft photo, looming deadline. Do you reach for a Deblur tool or crank up Sharpen? Here’s the short answer: if you’re looking at true blur (motion streaks or out‑of‑focus softness), start with deblurring; use sharpening mainly for mild softness or as a finishing touch.
Key takeaways
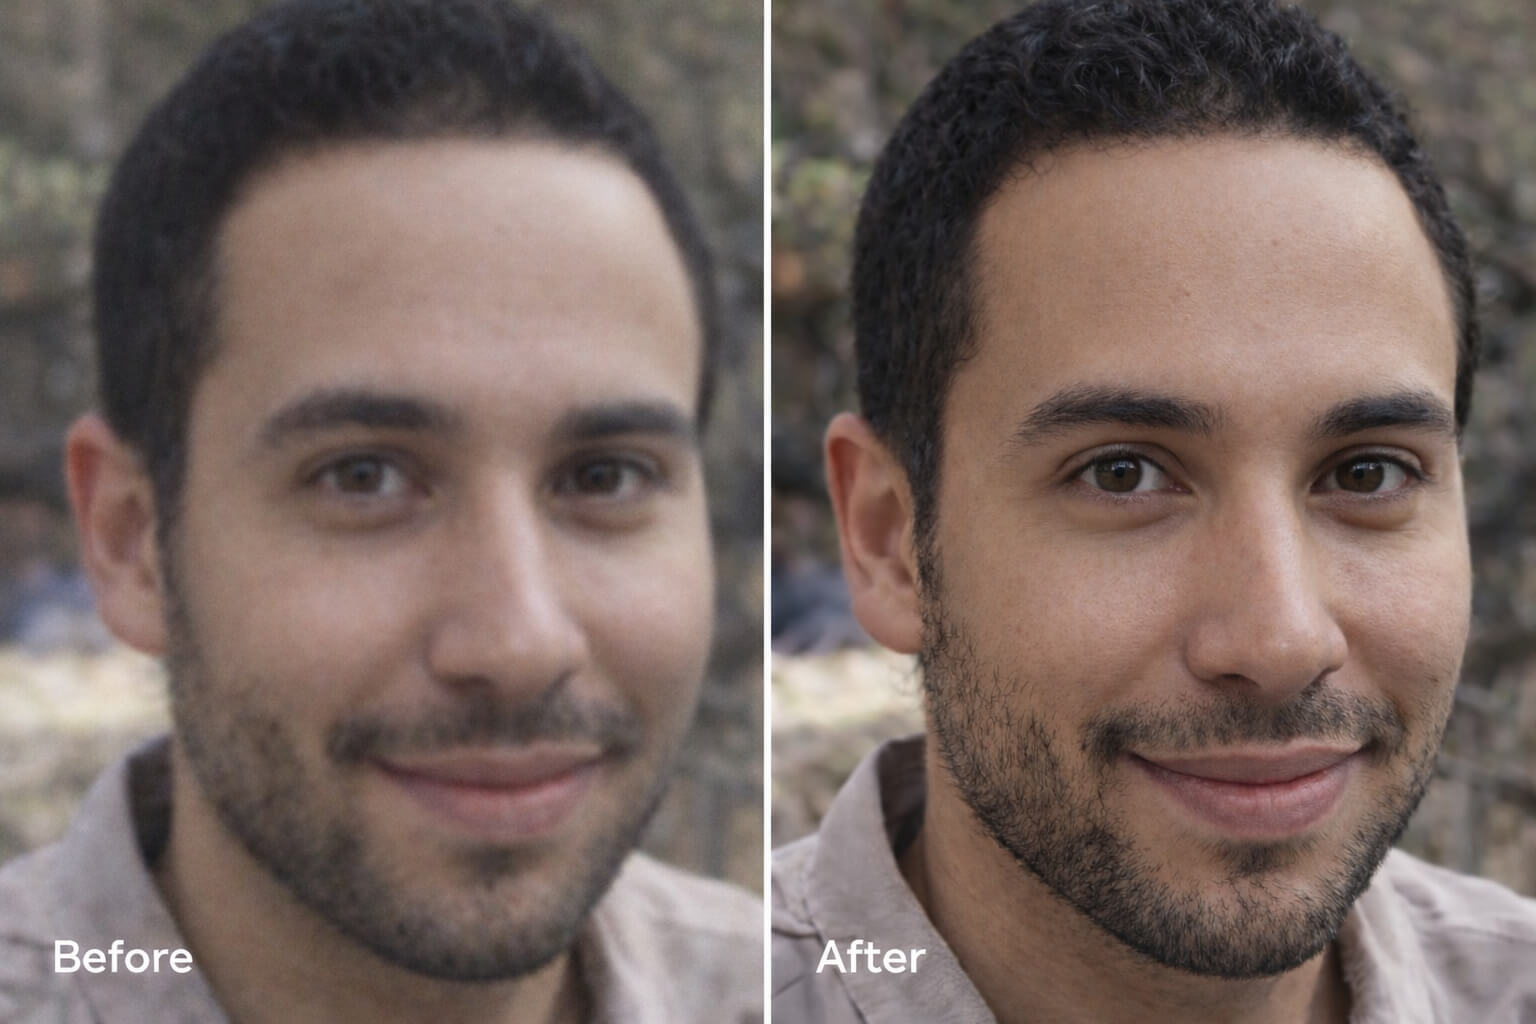
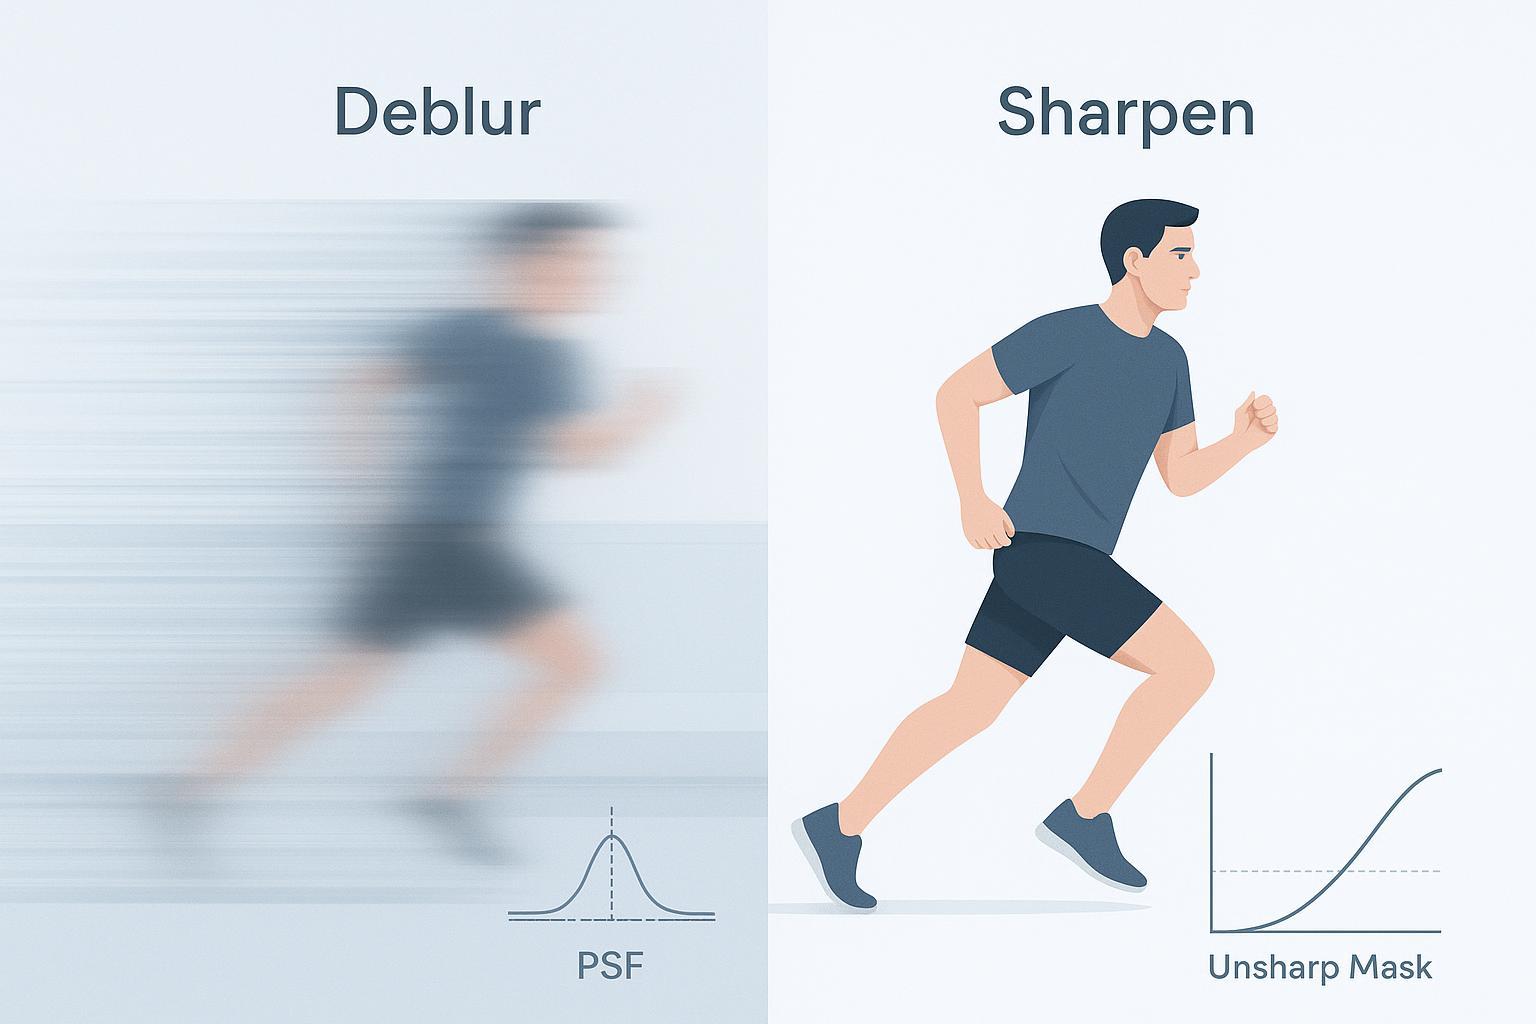
Deblur aims to reverse real blur (motion/defocus) by modeling it; Sharpen increases local edge contrast and can’t truly restore heavy blur.
If you can spot directional streaks or uniform, lens‑like softness, use deblurring first. For in‑focus images that look a little “soft,” light sharpening usually suffices.
Over‑sharpening causes halos and crispy textures; deblurring set too aggressively can hallucinate detail. Favor conservative settings and 100% inspections.
Practical workflow: denoise → deblur (if needed) → upscale (if needed) → light output sharpen last.
Need a blur fix path now? See the Remove Blur from Image guide for true‑blur cases.
Method | Best for | Quick verdict |
|---|---|---|
Deblur (deconvolution/AI) | Motion blur, defocus blur, some compression trails (with denoise) | Start here for true blur; finish with light sharpen |
Sharpen (USM/Smart Sharpen/High‑Pass) | Mild softness and output finishing | Great last step; not a cure for heavy blur |
Diagnostic decision flow: do you need deblurring or sharpening?
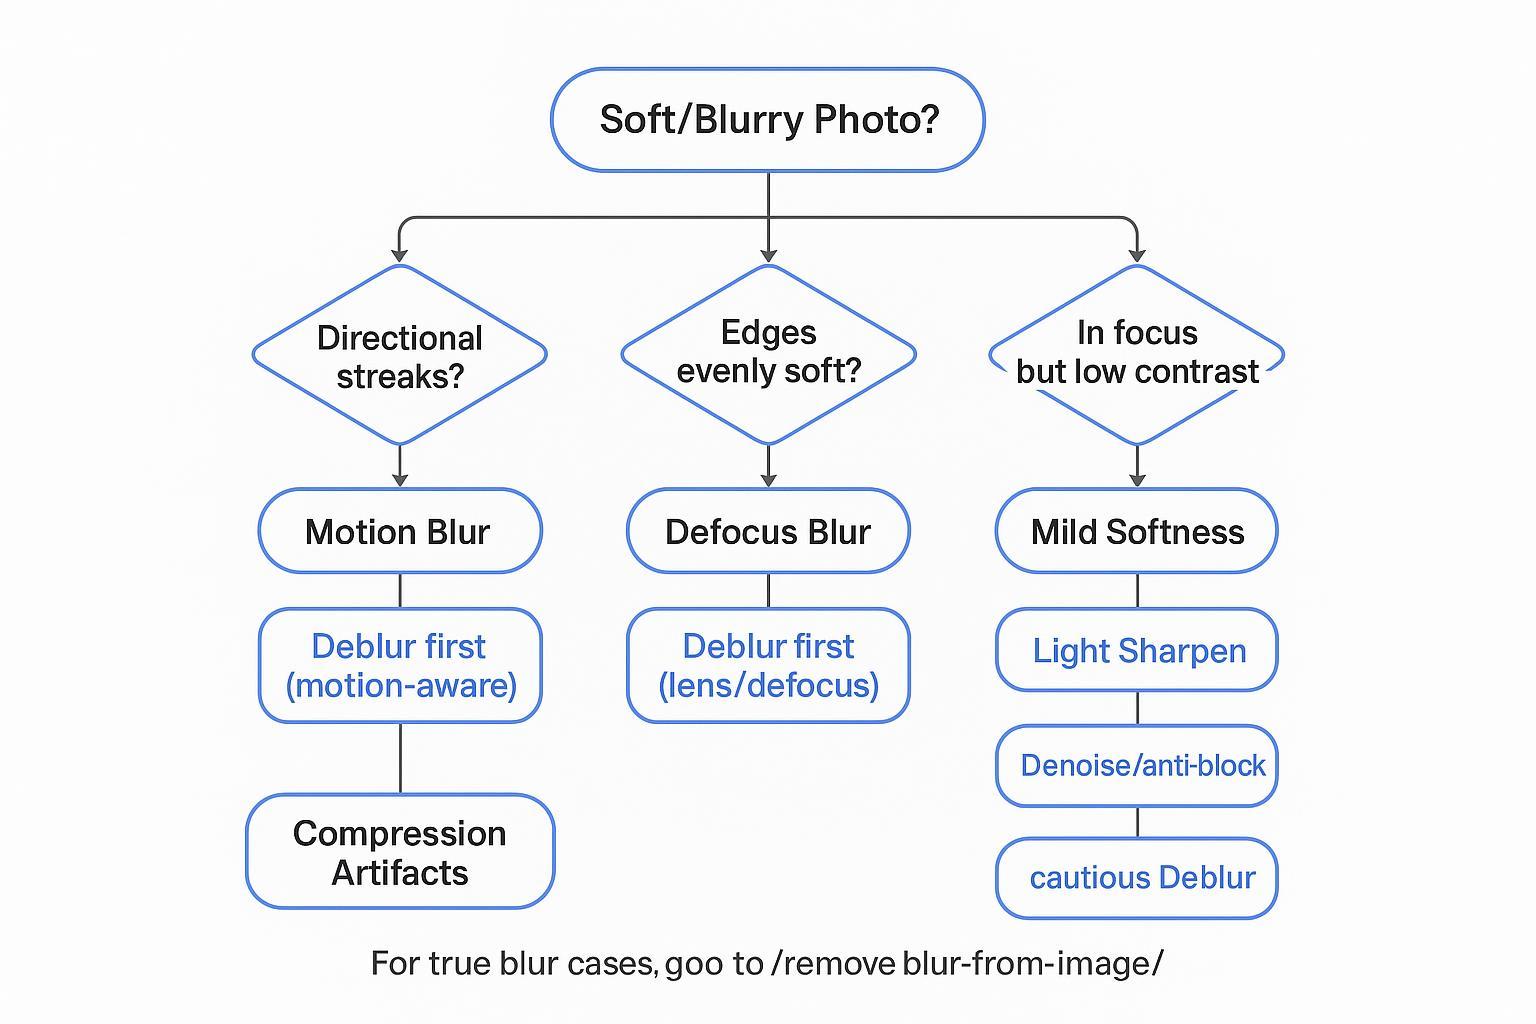
Do you see directional streaks on edges or text? That’s motion blur. Choose a motion‑aware Deblur first. For a practical fix path, head to the Remove Blur from Image guide.
Are edges evenly soft without a preferred direction? That’s defocus blur. Use a defocus/lens model in a Deblur tool first, then a very light Sharpen if needed.
Are edges present but just lack “snap,” and focus looks correct? That’s mild softness. Apply light Sharpen (Unsharp Mask/Smart Sharpen) with a small radius to avoid halos.
Do you notice blockiness or ghost edges (JPEG artifacts)? Clean with denoise/anti‑block, then cautious Deblur, then a light Sharpen if required.
Deblur explained: reversing true blur (physics + AI)
Deblurring tries to invert the blur that smeared detail in the first place. In a simple model, a blurred photo is the sharp scene convolved with a point spread function (PSF), plus noise. Deconvolution methods estimate that PSF—or assume one—and recover a sharper image. Classic approaches include Richardson–Lucy and Wiener filters, and modern AI systems learn strong priors that guide restoration. For approachable background, see the overview of deconvolution and point spread function fundamentals.
Why it works here: when blur comes from camera shake, subject motion, or missed focus, energy from fine details gets redistributed across neighboring pixels in specific patterns (directional for motion, more symmetric for defocus). Deblur methods exploit those patterns. Sharpening, by contrast, mainly boosts edge contrast; it doesn’t actually reconstruct high‑frequency content once it’s been smeared beyond recognition.
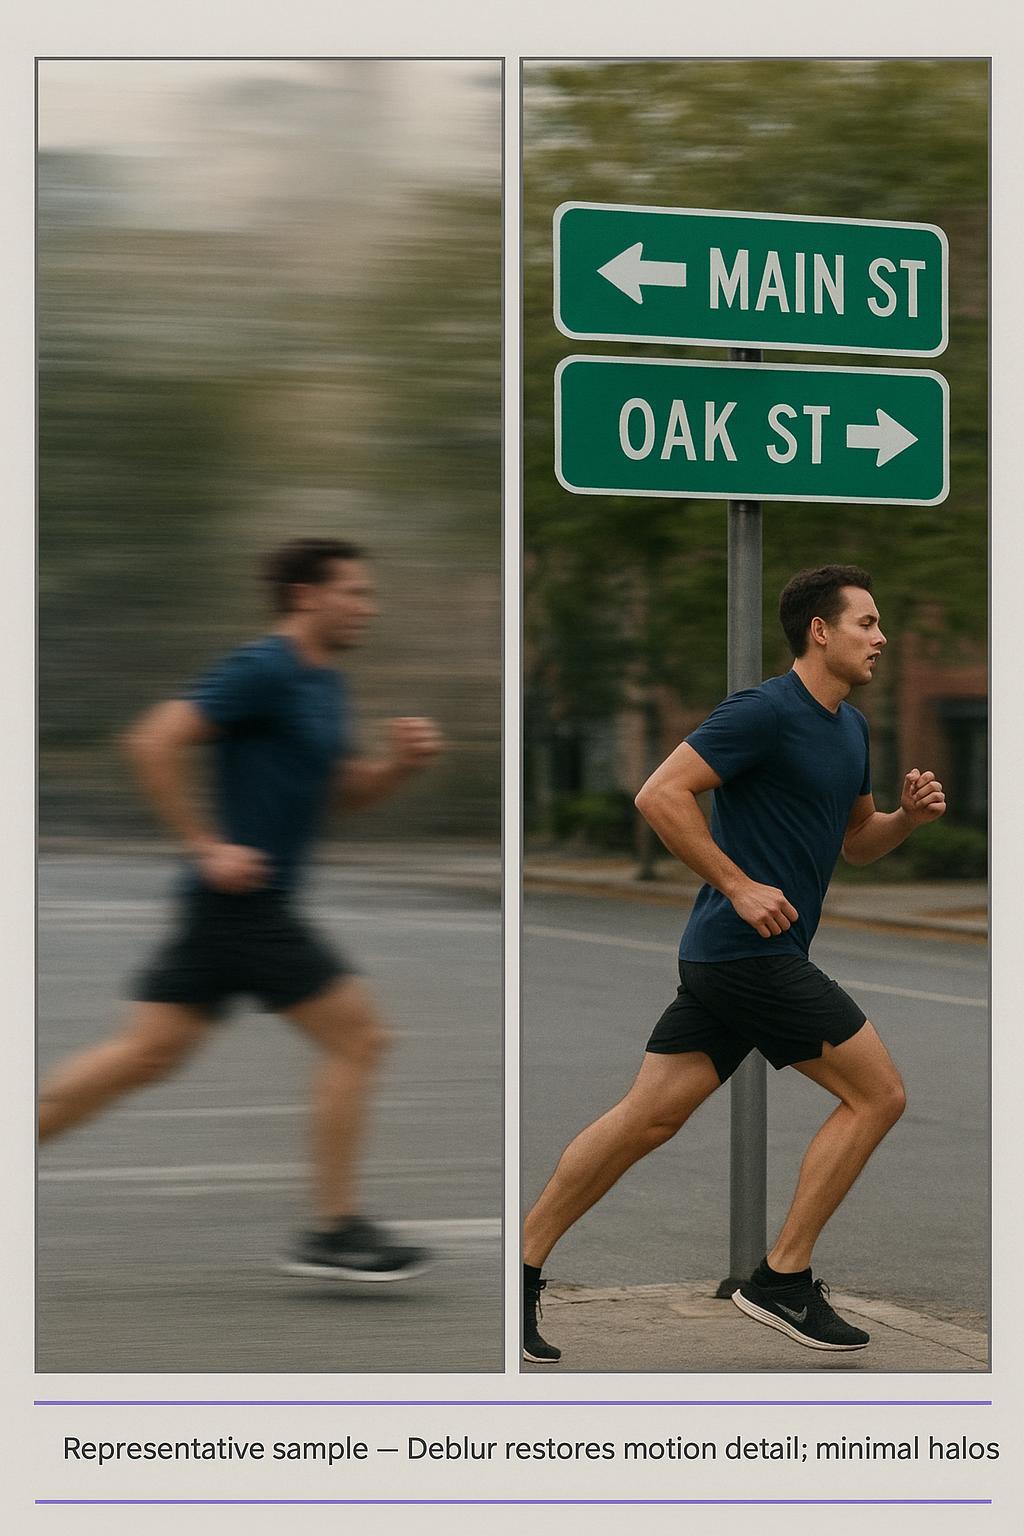
Representative result (conceptual):
Tips to stay artifact‑safe: Prefer conservative strength and watch for ringing around high‑contrast edges. If the file is noisy or blocky, run denoise/anti‑block before deblurring. After recovery, use a very light Sharpen at the end for final crispness only if the image truly needs it.
If your goal is to remove blur from image caused by motion or missed focus, you can start with this dedicated path: Remove Blur from Image. For a conceptual explainer on unblurring methods and decision points, explore the Ultimate Guide to Unblur Image.
Sharpen explained: what it really does (and doesn’t)
Sharpen filters such as Unsharp Mask and Smart Sharpen increase local edge contrast so edges look crisper. They don’t recreate missing detail; instead, they make existing edges more pronounced. Typical controls include Amount (how much contrast to add), Radius (how wide the effect spreads), and Threshold (how much contrast an edge must have before sharpening applies). Smart Sharpen adds options that attempt to remove Gaussian, lens‑like, or motion‑aligned blur and includes a Reduce Noise slider. Adobe documents these controls in detail in the Smart Sharpen help page and the Unsharp Mask guide.
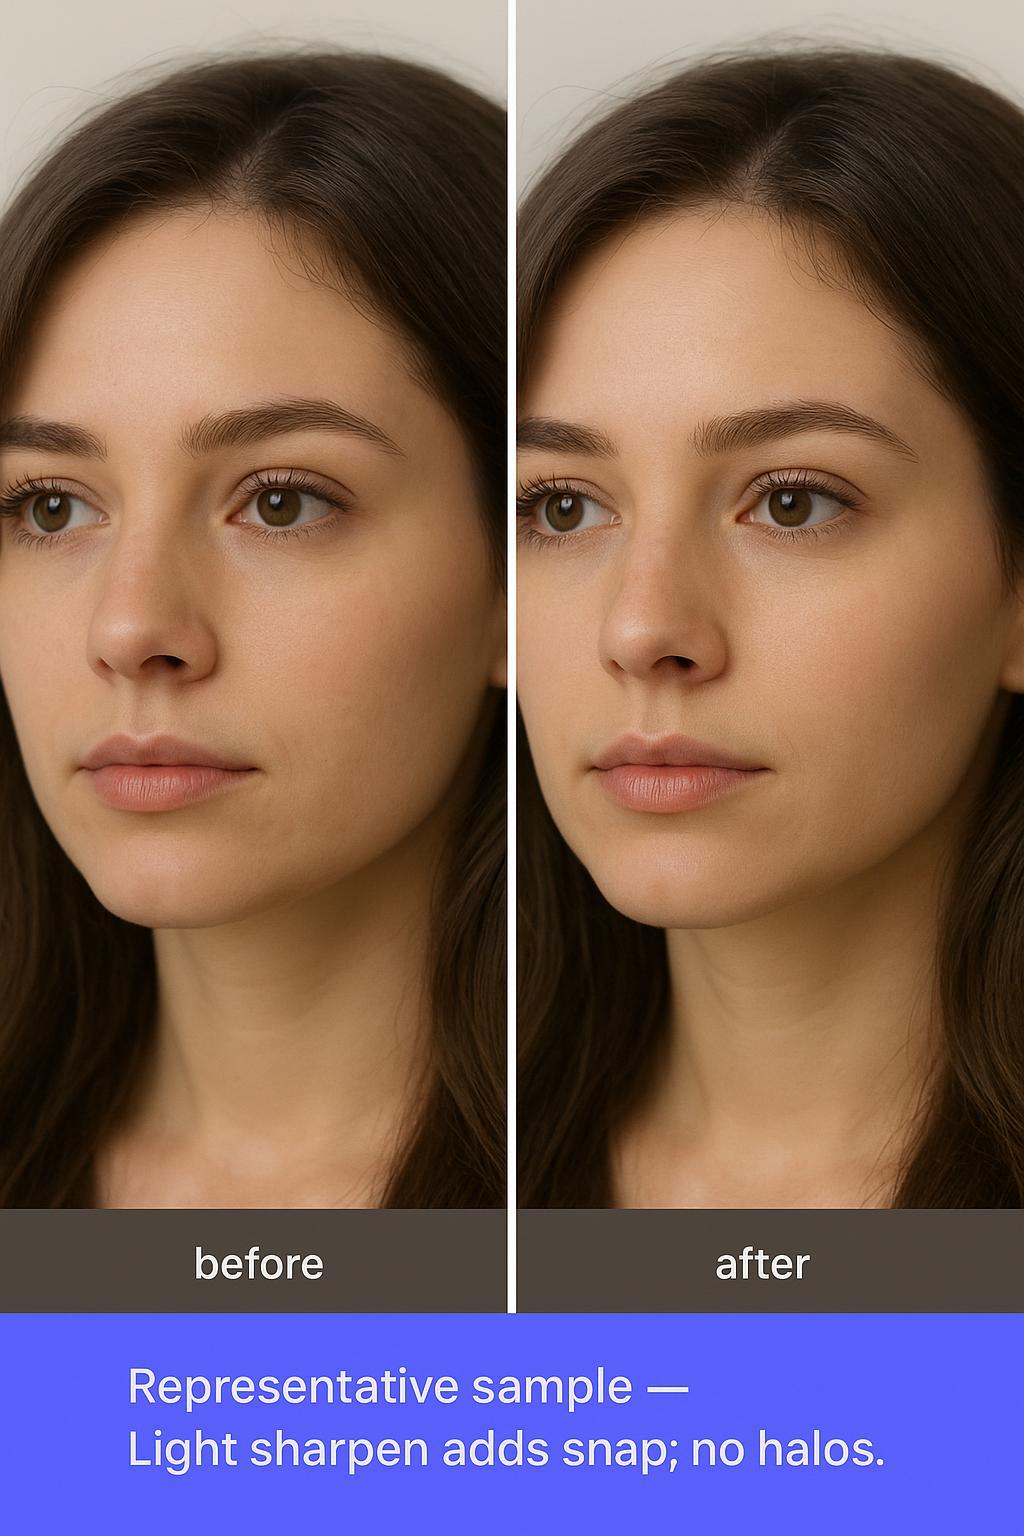
Representative result (conceptual):
To avoid halos, keep Radius small so halo width stays tight, raise Threshold to protect smooth areas like skin and sky, and consider edge masks so you sharpen outlines without amplifying noise. A classic tutorial explaining why unsharp mask increases acutance (not resolution) and how to control artifacts is Cambridge in Colour’s USM guide.
When it shines: The photo is fundamentally in focus but looks a touch flat, or you’re preparing final exports (print or resized web assets) and need output sharpening as the last step.
If you’re unsure whether your image needs deblurring first, revisit the diagnostic flow above. Using heavy Sharpen on a truly blurred image usually amplifies halos, noise, and ghost edges without restoring real detail.
Which should you use? A scenario playbook
Motion blur (directional streaks on edges/text): Deblur first with a motion‑aware model. After recovery, apply a light Sharpen only if needed. For a practical path to remove blur from image with motion or shake, start here: Remove Blur from Image.
Defocus / soft focus (even softness, missed focus/DOF limits): Deblur with a lens/defocus model. Avoid strong Sharpen early; it tends to create halos around eyelashes, hair, and contrasty edges.
JPEG/compression artifacts (blockiness, ghost edges): Denoise/anti‑block first, then cautious Deblur, then a light Sharpen to finish. Over‑sharpening will accentuate blocks.
Mild softness on an otherwise sharp image: Use Sharpen (Unsharp Mask or Smart Sharpen) with a small Radius and modest Amount; mask it to edges if possible.
Print/output finishing: Perform output sharpening last, after resizing for the destination medium, with conservative settings to keep textures natural.
Want a step‑by‑step deblur path you can try now? See the Remove Blur from Image page, or test an online unblur image workflow.
A workflow that actually works to remove blur from image
A practical, low‑risk order of operations many photographers and editors follow is: denoise → deblur → upscale (if needed) → light output sharpen. Educational resources on sharpening taxonomy emphasize that output sharpening belongs at the very end, after resizing, to avoid compounding halos and artifacts. For an accessible, time‑tested overview of capture/creative/output sharpening stages, see Cambridge in Colour’s workflow taxonomy. If you also plan to enlarge, consider handling upscaling before the final light sharpen so the sharpening radius matches the final pixel pitch. For a deeper dive into upscaling specifics, explore the AI Image Upscaler guide.
Evidence notes and constraints
Sharpening mechanics and controls, including Smart Sharpen’s modes and Unsharp Mask’s parameters, are documented in Adobe’s official help materials (linked above). Adobe also notes that its legacy Camera Shake Reduction feature was removed from Photoshop in 2022 due to platform changes; see Adobe’s removal note for Reduce Camera Shake blurring (2022).
Deconvolution concepts (PSF; Richardson–Lucy; Wiener) are well established and explain why deblur can recover motion/defocus detail that sharpening alone cannot; see the deconvolution overview for a primer.
AI deblurring is powerful but not magic. Aggressive settings can invent texture. Keep it conservative and double‑check 100% crops around high‑contrast edges and faces.
FAQs
Should I deblur or sharpen a blurry photo? If you see directional streaks or uniform out‑of‑focus softness, start with deblurring; reserve sharpening for mild softness or as a finishing step. For true blur cases, follow the Remove Blur from Image path.
Can sharpening fix motion blur? It can slightly reduce the appearance in some cases, but motion blur usually needs deblurring methods that model the blur itself; sharpening is better as a final touch. Adobe’s Smart Sharpen offers a Motion setting but remains an edge‑contrast method, as detailed in Adobe’s Smart Sharpen help.
How can I tell if my image needs deblurring or sharpening? Directional streaks → motion blur (Deblur). Even softness → defocus (Deblur). In‑focus edges that just lack contrast → mild softness (light Sharpen). The flowchart above summarizes these routes.
What order should I use for the cleanest results? Denoise/anti‑block → Deblur → Upscale (if needed) → Light output Sharpen. Keep halos small and check at 100% magnification. Guidance on final‑stage sharpening appears in Cambridge in Colour’s workflow guide.
Will AI deblur create fake details? It can if pushed too far. Prefer conservative settings and compare against the original at 100%. Use light sharpening only at the end if truly necessary.
If you remember nothing else, remember this: Deblur solves true blur; Sharpen finishes the job. Start with the right diagnosis, and you’ll spend less time fixing artifacts and more time delivering images that look naturally sharp.

Dr. Katherine L. Whitmore
Dr. Katherine L. Whitmore specializes in AI-powered image enhancement and e-commerce visual optimization. She writes practical, data-driven guides on improving product image clarity, meeting marketplace standards, and increasing conversions through high-quality visuals.
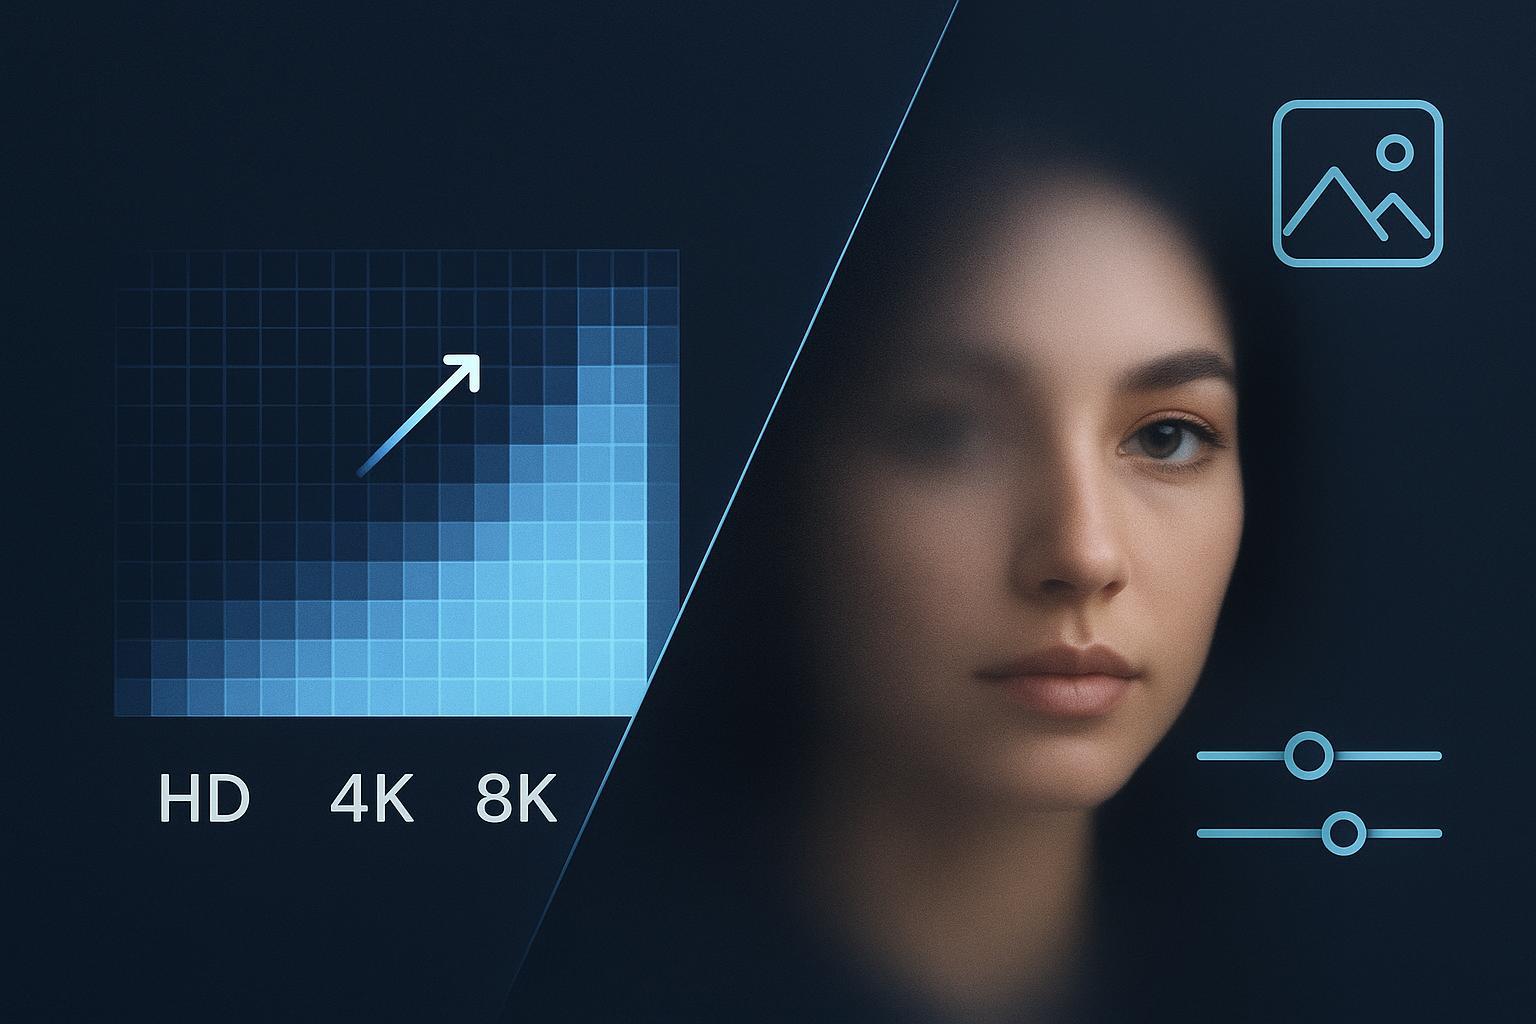
Ready to Enhance Your Photos & Videos?
Improve clarity, restore old images, and upscale to 4K with natural, artifact-free detail — in seconds.
Start Creating