4K Image Converter — When HD Is Not Enough for Ads, Social, and Print
Step-by-step 4K image converter workflow for paid ads—preserve natural textures, reduce artifacts, and export ad-ready sizes. Try an image online.
When a paid placement compresses, resizes, and crops your upload, an ordinary HD file can fall apart fast—edges fray, small text softens, gradients band, and logos pick up halos. The fix isn’t “crank up sharpening.” It’s a texture‑safe workflow that starts with a higher‑fidelity master and ends with exports matched to each placement. This guide shows how to use a 4K image converter process to produce natural‑looking, low‑artifact assets for ads, with brief notes for social and print.
We won’t claim higher resolution alone boosts CTR or lowers CPA. Instead, we’ll focus on quality resilience: 4K masters better withstand platform recompression and auto‑cropping so your creative looks clean and compliant after it’s published.
Key takeaways
4K masters give you headroom so platform downscaling and re‑encoding don’t destroy fine detail or legibility.
The order that protects texture is: denoise/deblock → upscale to 4K with conservative settings → light, selective finishing → export to exact placement sizes.
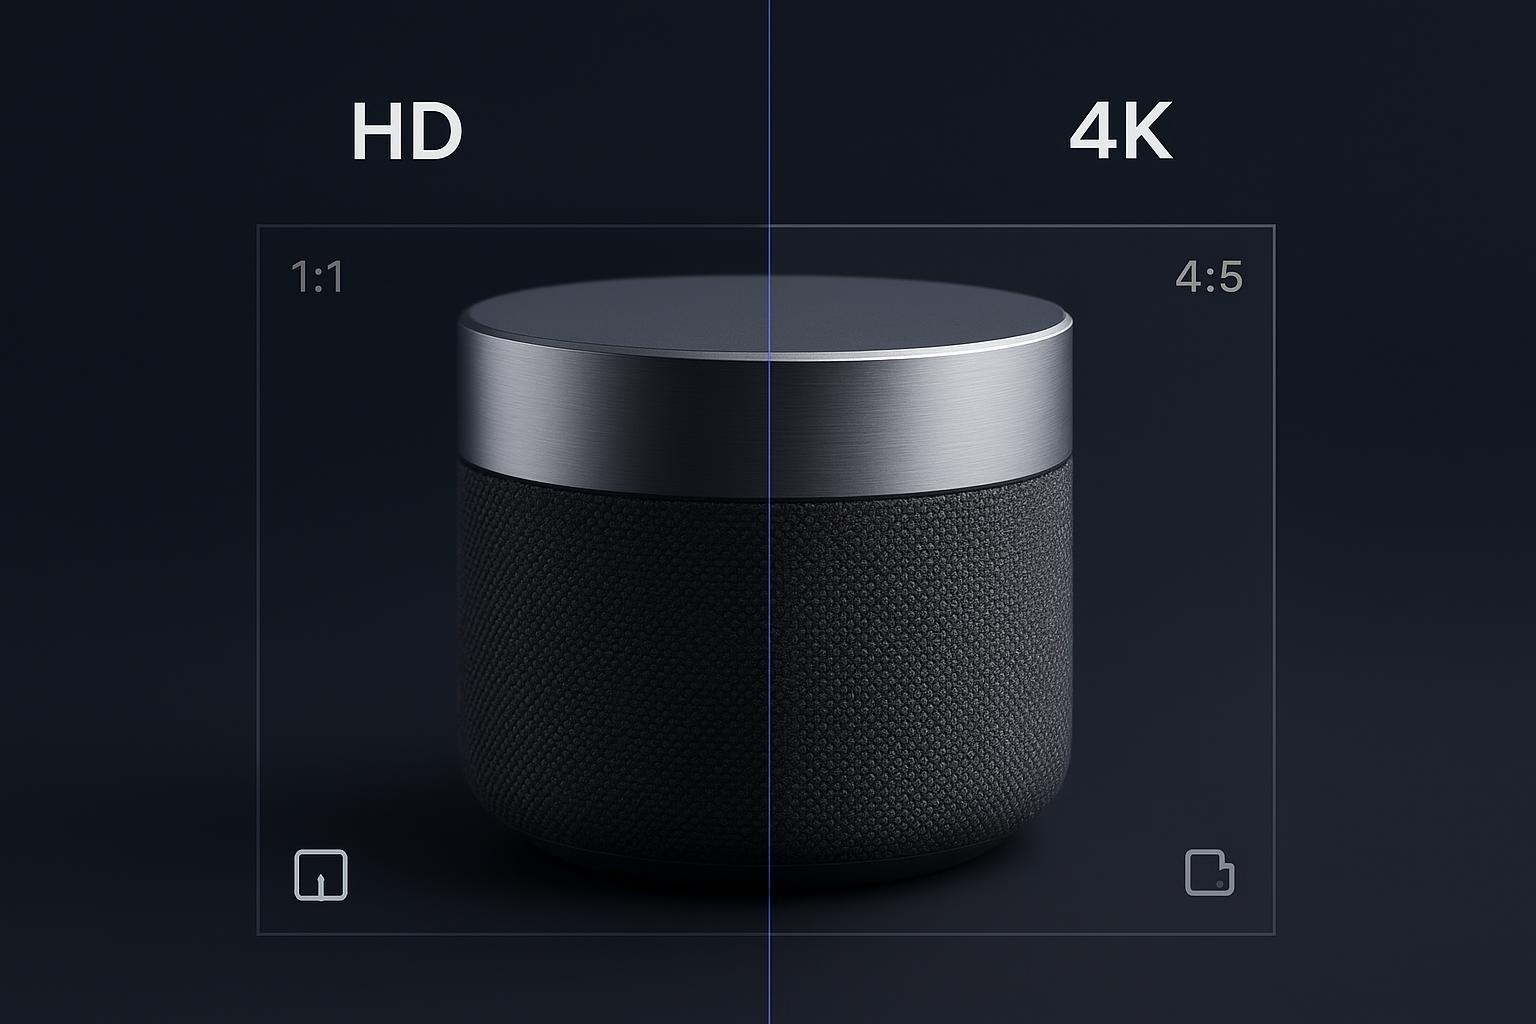
Plan aspect ratios (1:1, 4:5, 1.91:1, 9:16) before you upscale; compose inside safe zones to avoid UI and auto‑crop issues.
Use WebP (when accepted) or balanced‑quality JPEG for ad exports; reserve PNG for logos/graphics/transparency.
Verify specs and test previews inside each ad manager—platform guidance updates frequently.
Why 4K masters matter for paid ads
Ad platforms frequently transform your uploads—resizing, re‑compressing, and sometimes auto‑cropping to fit surface requirements. Common working sizes for Meta feed images include 1:1 and 4:5 with display baselines around 1080 px on the short side; Stories/Reels prefer 9:16 at 1080×1920, with safe zones near the top and bottom. Current public summaries align on these baselines and recommend supplying multiple ratios to reduce in‑platform transforms, as outlined by Buffer’s 2026 image and ad spec roundups and Hootsuite’s 2025–2026 guidance for Facebook and Instagram (verify in Ads Manager at publish time). See the latest overviews in resources like the Buffer Facebook ad specs (2026) and Hootsuite’s Facebook and Instagram sizing guides updated in 2025–2026.
Google Ads recommends Performance Max image assets such as 1200×628 (1.91:1), 1200×1200 (1:1), and 960×1200 (4:5); the official table notes minimums and accepted formats, and encourages providing multiple ratios to maximize coverage, per Google Ads Help (last updated 2025–2026). TikTok’s help center documents vertical 9:16 as preferred for in‑feed and stories, with minimums like 540×960 and explicit reminders to avoid blurry or unclear visuals—which again argues for quality headroom in your master.
The throughline: higher‑fidelity masters survive these transforms with fewer visible artifacts. Think of it this way—if the platform has to crush a file, give it more fine‑grained signal to work with.
Citations and official snapshots you can review:
Google Ads Help — best practices for image assets in Performance Max (2025): Google Ads image assets guidance
TikTok for Business (2026): Auction In‑Feed Ads supported ratios and minimums
Buffer (2026) and Hootsuite (2025–2026) overviews corroborate Meta working sizes. Example: Buffer’s Facebook ad specs 2026 and Hootsuite’s Facebook ad sizes
Key concepts for a texture‑safe 4K image converter
Before we jump into steps, align on a few fundamentals that steer results away from plastic skin, rainbow edges, or crunchy halos.
Resampling order matters. A widely recommended order for photographic ads is: denoise/deblock first, then upscale, then apply gentle, selective sharpening only if needed. See best‑practice write‑ups such as Runway’s 2026 guide to upscaling and LetsEnhance’s 2026 denoising and upscaling tutorials for reference.
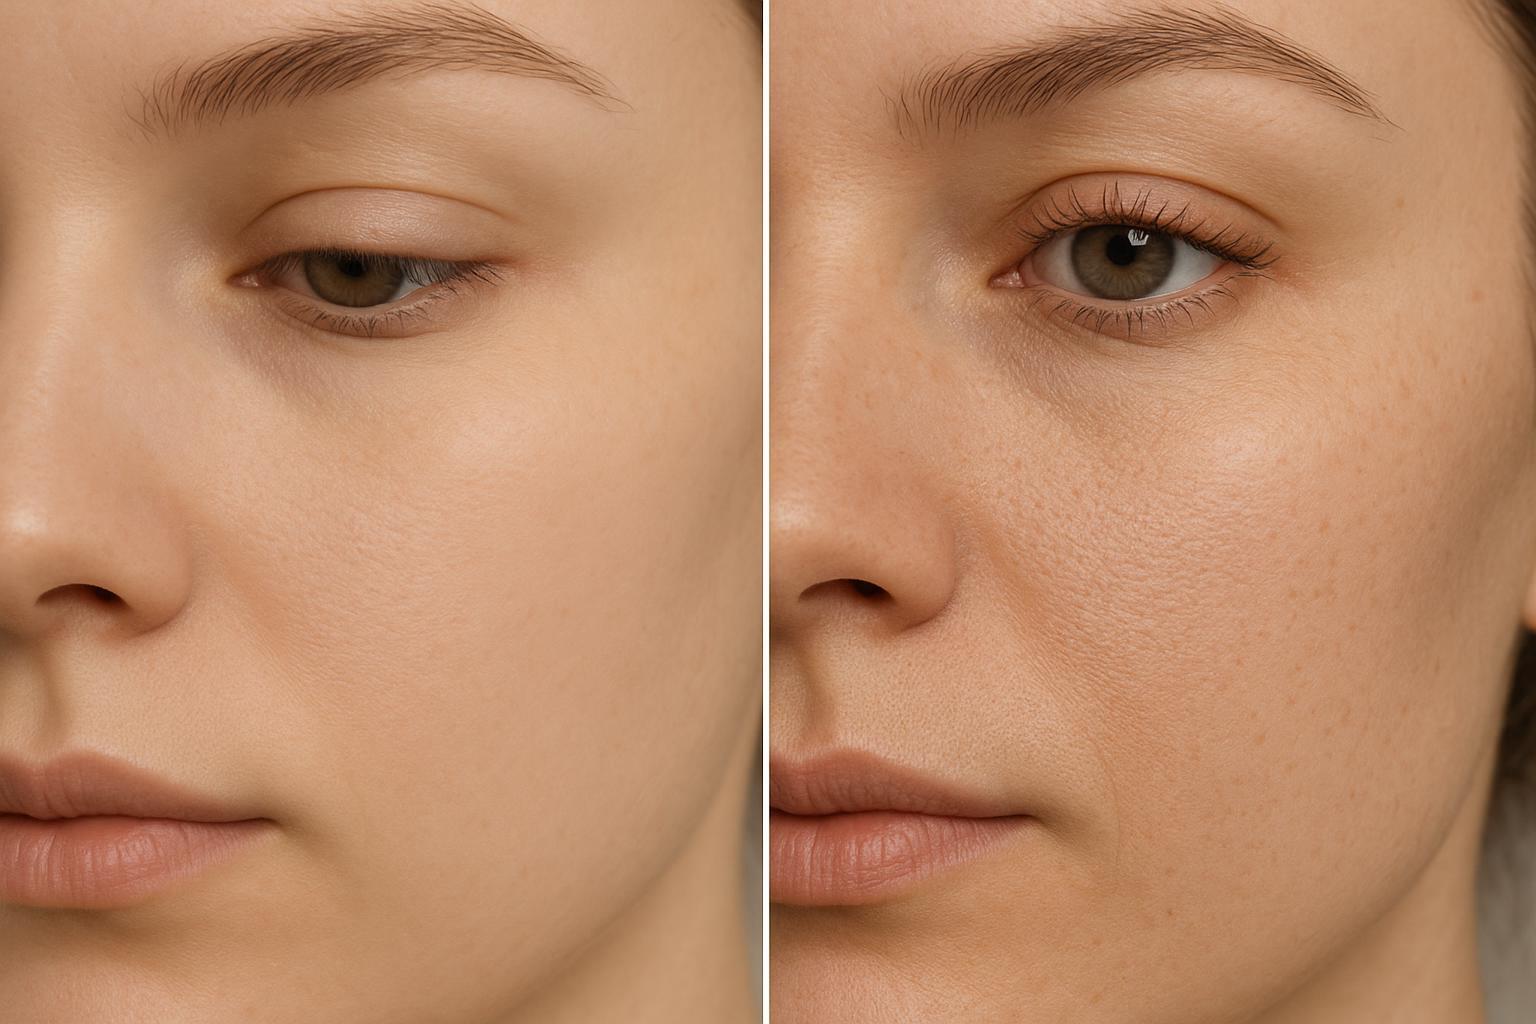
Artifact taxonomy to watch at 100% zoom:
Halos: bright outlines hugging edges after oversharpening.
Ringing: faint ripples near high‑contrast edges.
Aliasing/zippering: stair‑steps on diagonals, small text fringing.
AI texture hallucination: overly synthetic pores/fabric that look “plasticky.”
Banding: visible steps in smooth gradients (e.g., skies, backdrops).
Conservative model bias. If your 4K image converter offers modes, start with options labeled gentle, balanced, or authentic to preserve natural textures and keep artifacts low.
Multi‑pass vs. single jump. For some inputs, 2× then 2× can produce cleaner edges than a single 4× leap.
Useful background reading:
Runway — 2026: How to upscale images with AI (best practices)
LetsEnhance — 2026: AI image denoising workflow
LetsEnhance — 2026: How to upscale images
Ads‑first workflow step by step
Follow this production‑grade sequence to prepare 4K masters that hold up in paid placements.
Plan aspect ratios before you touch pixels
Decide deliverables per campaign: 1:1 and 4:5 for Meta feed; 1.91:1 for Google; 9:16 for Stories/Reels/TikTok. Sketch safe zones so key elements avoid UI overlays. Keep vector text and logos on separate layers in your master file.
Inspect the source and pre‑clean gently
Prefer originals over social‑scraped copies. In sRGB, evaluate noise, JPEG blocks, motion/defocus blur, and gradient banding. Apply mild denoise/deblock first so you don’t upscale the junk.
Upscale to 4K with a fidelity‑first approach
If starting near HD, upscale to around 3840 px on the long edge (or run 2×+2×). Avoid aggressive sharpening inside the upscaler; prioritize natural micro‑contrast and low artifacts. Pause here and inspect 100% crops (fabric, labels, fine edges).
Post‑upscale QA at 100% zoom
Hunt for halos, ringing, aliasing, plastic texture, and banding. If you see them, roll back sharpening, switch to a gentler model, or try multi‑pass upscaling.
Targeted finishing only if needed
Add selective, low‑radius sharpening to slightly soft regions (radius ≤ 1.0 px; amount modest). For banding, introduce a touch of fine grain/dither to smooth steps.
Export to placement sizes and formats
Export exact pixel dimensions for each placement to minimize platform transforms. Use WebP where supported for smaller files at similar quality; otherwise JPEG at Q70–85. Reserve PNG for graphics/transparency or crisp UI elements.
Validate in platform previews
Upload test variants into each ad manager, confirm crops, file size limits, and that subtle textures survive recompression. Keep a layered master (PSD/AFphoto) for revisions.
Platform export presets at a glance
Below are common ratios and example working sizes you can export to. Always verify the latest help pages in your ad manager when you publish.
Channel | Ratio | Example working size |
|---|---|---|
Meta (Feed) | 1:1 | 1440×1440 (often displayed near 1080×1080) |
Meta (Feed) | 4:5 | 1440×1800 (often displayed near 1080×1350) |
Meta (Stories/Reels) | 9:16 | 1080×1920 |
Google Ads (PMax) | 1.91:1 | 1200×628 (min 600×314) |
Google Ads (PMax) | 1:1 | 1200×1200 (min 300×300) |
Google Ads (PMax) | 4:5 | 960×1200 (min 480×600) |
TikTok In‑Feed | 9:16 | ≥1080×1920 (min 540×960) |
LinkedIn Single Image | 1.91:1 | ~1200×628 |
LinkedIn Single Image | 1:1 | 1200×1200 |
References for specs and rationale:
Google Ads Help (2025): Best practices for image assets in Performance Max
TikTok for Business (2026): Auction In‑Feed Ads specs
Cross‑checked Meta/LinkedIn sizes via Buffer and Hootsuite roundups updated 2025–2026: Buffer Facebook ad specs 2026, Hootsuite Facebook ad sizes
Troubleshooting and artifact fixes
Use this quick diagnosis guide when a result doesn’t look production‑ready.
Halos around edges
What you’re seeing: Bright outlines hugging high‑contrast edges.
Fixes: Reduce or disable sharpening; pick a gentler upscaling mode; try multi‑pass (2× then 2×) instead of a single leap.
Ringing near edges
What you’re seeing: Subtle ripples parallel to edges.
Fixes: Lower global sharpening/micro‑contrast; re‑export at slightly different compression; avoid extreme enhancement modes.
Aliasing/zippering on diagonals and small text
What you’re seeing: Stair‑steps and color fringing.
Fixes: Re‑upscale with conservative settings; try multi‑pass; replace logos/text with vectors where possible.
Overly synthetic textures
What you’re seeing: Pores/fabrics look plastic or “invented.”
Fixes: Switch to a fidelity/“authentic” model; reduce aggressiveness; add a touch of fine grain to restore a natural look.
Banding in gradients
What you’re seeing: Stepwise shading in skies or backdrops.
Fixes: Export as WebP at adequate quality; add light dither/grain; avoid overly heavy JPEG compression.
For background on workflow order and artifact handling, see Runway’s 2026 upscaling best practices and LetsEnhance’s denoise/upscale guides linked earlier.
Practical example: square and vertical ad pair
Scenario: You have a solid HD product photo and need Meta feed variants in 1:1 and 4:5 with crisp, natural texture.
Pre‑clean: Run mild denoise/deblock so compression junk doesn’t scale up.
Upscale: Use a conservative, texture‑preserving mode to reach ~3840 px on the long edge (or 2×+2× from a smaller start). Inspect 100% crops of fabrics and labels.
Crop: Produce 1440×1440 (1:1) and 1440×1800 (4:5) masters; keep key elements in safe zones.
Finish: Apply selective low‑radius sharpening only if necessary; add slight grain if gradients band.
Export: Prefer WebP (visual quality target) or JPEG Q80–85. Verify clarity and file size in Meta’s preview.
Tooling note: You can use Artedge AI to execute the upscale step within this workflow; it supports image enhancement and 4K upscaling with a focus on clarity and natural detail. See Artedge AI for the general capability overview.
Quick note on print sizing with 4K masters
4K gives you respectable headroom for small to medium prints. As a rule of thumb: width (in) = pixels ÷ DPI; height (in) = pixels ÷ DPI. A 3840×2160 image yields roughly 12.8×7.2 inches at 300 DPI, ~16×9 inches at 240 DPI, and ~25.6×14.4 inches at 150 DPI. For close‑view pieces, aim for 300 DPI; for posters viewed at a distance, 150–240 DPI can be acceptable. For details, see Adobe’s guidance on image size and resolution: Adobe Photoshop Help — Set image size and resolution.
Closing checklist and next steps
Use this short checklist to standardize your ad‑ready 4K workflow.
Confirm deliverable ratios and safe zones (1:1, 4:5, 1.91:1, 9:16)
Inspect source; denoise/deblock gently in sRGB
Upscale with a conservative 4K image converter model (avoid aggressive sharpening)
QA at 100% for halos, ringing, aliasing, plastic texture, banding
Apply selective micro‑sharpening and slight grain only if needed
Export exact placement sizes in WebP (preferred) or JPEG Q70–85; reserve PNG for graphics/alpha
Validate in platform previews; archive a layered master for fast revisions
Ready to see how your creative holds up? Upload an image to try online now: 4K Upscaler.

Dr. Katherine L. Whitmore
Dr. Katherine L. Whitmore specializes in AI-powered image enhancement and e-commerce visual optimization. She writes practical, data-driven guides on improving product image clarity, meeting marketplace standards, and increasing conversions through high-quality visuals.
Ready to Enhance Your Photos & Videos?
Improve clarity, restore old images, and upscale to 4K with natural, artifact-free detail — in seconds.
Start Creating